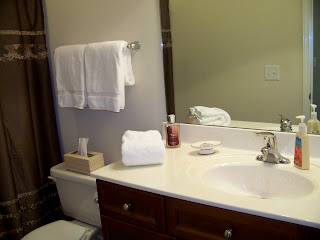
I love decorating and design, and I especially love design that mixes form and function. When we moved into this house we spent hundreds of extra dollars you'll likely never see on gliding drawers for the kids' kitchen cupboard, a drawer for our bathroom (there wasn't a single drawer in the master bath), and other organizational items. As much as I value a beautiful home, I value an organized, functional one. I believe a space needs to be both beautiful and practical.
We have a wall across from our pantry that has been bare since we moved in. (Actually, it had a drawing that Brennan made taped to it with painter's tape for several months.) It seemed like the perfect space for a chalkboard wall! A chalkboard would fill an empty space, create interest, and serve many purposes.
I learned several things about working with magnetic paint and chalkboard paint that I thought I would share, in case you are considering using it for yourself.
Before I started, I used painter's tape and a level to tape off my rectangle. (Don't skip the level if you're going to do straight lines!)
Next, I did perhaps the most important step. I used the existing wall color and painted over the painter's tape inside the rectangle.
No matter how hard you press down your tape, you will have some paint leak under it. By painting the first coat with your wall color, you ensure that any leakage will be undetectable. And, that first layer of paint protects other layers from seeping underneath.
After my sealer coat was dry, I applied a thin coat of magnetic paint with a mini roller. I fully covered the space, but I didn't pile the paint on. (Magnetic paint is full of small magnetic filaments, and many, thinner coats are better than fewer, heavier coats.) Thirty minutes after the first coat was finished, I applied another coat. Thirty minutes after that, I applied a third coat. Altogether I applied five thin coats of magnetic paint. This was a full small can of paint. (It said on the box that it would do three coats for a space about the size I was doing, but I'm glad I spread the coats out more.)
Just so you know, you don't have to use a magnetic paint primer. I just really wanted to be able to hang things on my wall, and I wanted Brennan to be able to play there with his magnets.
This is where I reveal my first major
oops in hopes that you will avoid doing the same. When it came time to clean the magnetic paint, I discovered that it was an absolute beast to get off of stuff. It was oily, gritty, and miserable. Honestly, if you're a messy painter, you'll probably want to wear rubber gloves, because it was a lot of work to even get it off my hands. And my painter's tray? It was trashed. I should have used a disposable liner and don't know why I didn't. Honestly, when I saw what cleaning the tray was doing to my beautiful kitchen sink and wedding ring, I stopped caring about the tray and worked to save the other things. The tray went in the trash. It would have taken hours to get it clean.
Next, I applied my first coat of chalkboard paint. One coat with a large roller.
Four hours later, I applied a second coat. (This is per instructions. I am not a patient person.)
When the second coat was visibly dry, I removed the tape. Look at those lines!!! I didn't even have to touch anything up!
We waited three long days for the paint to cure. Then, I primed the whole chalkboard with a piece of chalk.
It used an entire piece of giant sidewalk chalk and made a huge dust mess on my floor.
After cleaning the mess and washing the wall, we were finally able to play!
Unfortunately, the the chalk dust continues to be a problem. The practical side of me thinks I'm going to have to go buy chalk pens to avoid cleaning my floor every single day.
Have you painted a chalkboard wall before? Have other fun, practical tips for marrying form and function?


